[fusion_builder_container hundred_percent=”yes” overflow=”visible”][fusion_builder_row][fusion_builder_column type=”1_1″ background_position=”left top” background_color=”” border_size=”” border_color=”” border_style=”solid” spacing=”yes” background_image=”” background_repeat=”no-repeat” padding=”” margin_top=”0px” margin_bottom=”0px” class=”” id=”” animation_type=”” animation_speed=”0.3″ animation_direction=”left” hide_on_mobile=”no” center_content=”no” min_height=”none”][fusion_title size=”1″ content_align=”left” style_type=”none” sep_color=”” margin_top=”” margin_bottom=”” class=”” id=””]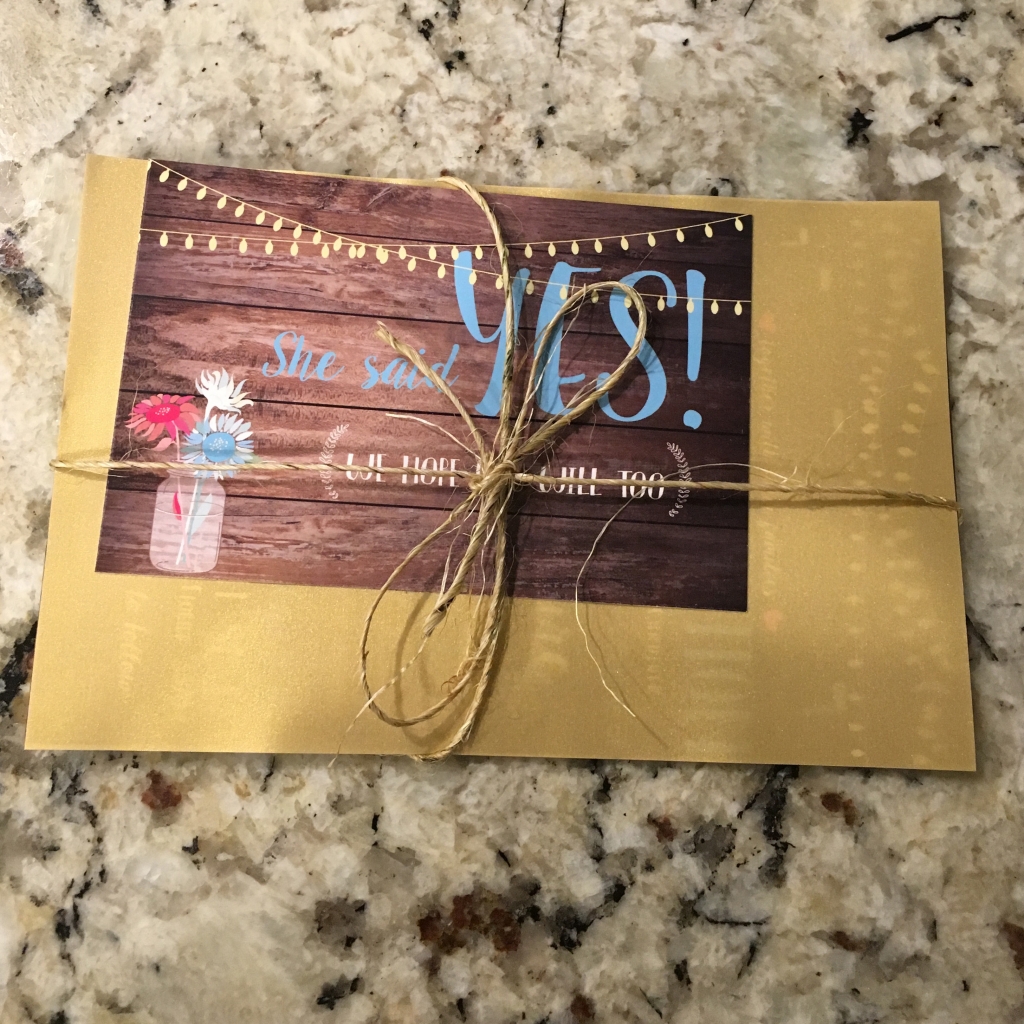
Signed, Sealed, Delivered[/fusion_title][fusion_text]Welp, it’s official. There is no turning back now! (Not there was ever a chance anyways). The invites are in the mail, just waiting to be received.
One of my major goals over my trip home to Florida was to take advantage of the extra set of hands and time to gather all the materials for my invitations, put them together, and stuff them. I underestimated the craziness of this holiday season, but nevertheless they got done so mission accomplished![/fusion_text][fusion_separator style_type=”double|dotted” top_margin=”” bottom_margin=”30″ sep_color=”#81d742″ border_size=”” icon=”fa-envelope-o” icon_circle=”yes” icon_circle_color=”#1e73be” width=”” alignment=”center” class=”” id=””/][fusion_text]I had already been discussing and designing the invitations and RSVP cards with Ashley for a couple months back and forth, so that part was done. I had my online order from Vistaprint shipped to my parents’ house in Florida, so they were waiting for me when I came home.
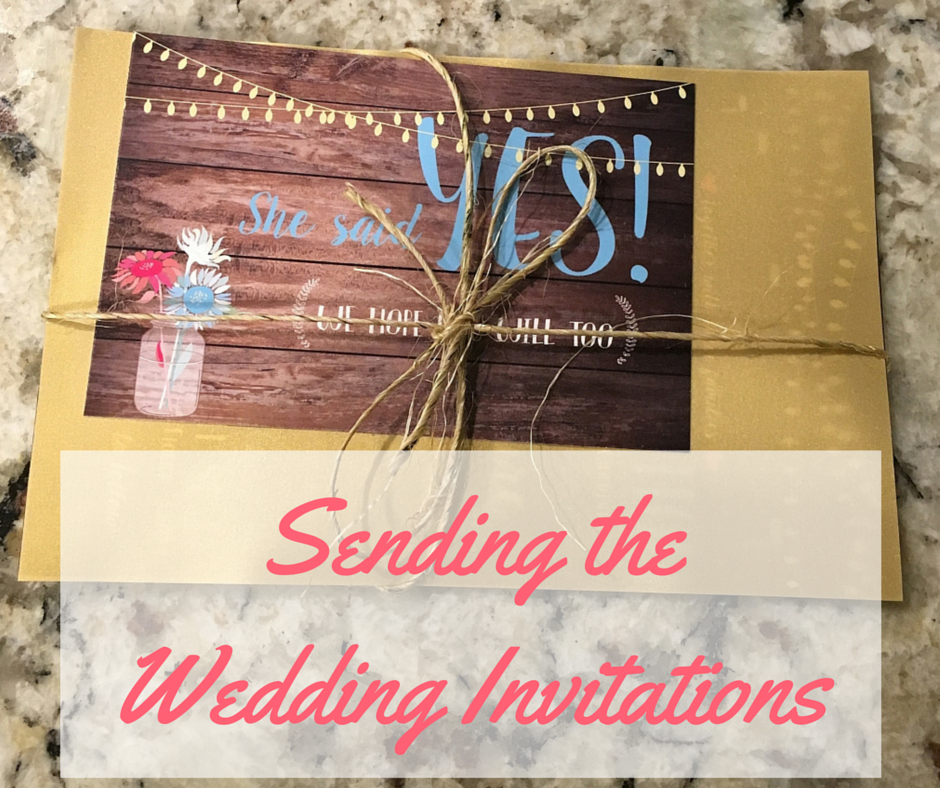
I decided not to spend extra money on fancy envelopes since people throw them away anyways, so I tried to make the invite special in other ways. I also wanted to convey the rustic/casual theme I am going for the wedding.[/fusion_text][fusion_separator style_type=”double|dotted” top_margin=”” bottom_margin=”30″ sep_color=”#81d742″ border_size=”” icon=”fa-envelope-o” icon_circle=”yes” icon_circle_color=”#1e73be” width=”” alignment=”center” class=”” id=””/][/fusion_builder_column][fusion_builder_column type=”1_1″ background_position=”left top” background_color=”” border_size=”” border_color=”” border_style=”solid” spacing=”yes” background_image=”” background_repeat=”no-repeat” padding=”” margin_top=”0px” margin_bottom=”0px” class=”” id=”” animation_type=”” animation_speed=”0.3″ animation_direction=”left” hide_on_mobile=”no” center_content=”no” min_height=”none”][fusion_title size=”1″ content_align=”left” style_type=”none” sep_color=”” margin_top=”” margin_bottom=”” class=”” id=””]Trial and Error[/fusion_title][fusion_text]
My sister and I went to Michael’s as a research and trial-and-error trip in order to see what sparked our interest and different options I could do to make it look pretty. We considered a pretty paper clip type thing, but I already had it set in my mind that I wanted twine. Twine and burlap seem to be very “in” right now— according to Pinterest anyways. Since I am somewhat DIYing my wedding, and on a budget, this theme seemed to fit my interests, venue, and budget.

My sister also suggested placing something between the RSVP card and the invitation itself, to separate the two and make people stop and enjoy opening the whole concept. I ended up in the scrapbook aisle looking at gold vellum. This seemed to match the colors and vibe of my invites, so I cut 8.5” x 11” sheets of vellum in half, which fit my invites perfectly. I considered using a punch to create pretty designs in the vellum, but that seemed to be more trouble than it was worth.
 [/fusion_text][fusion_separator style_type=”double|dotted” top_margin=”” bottom_margin=”30″ sep_color=”#81d742″ border_size=”” icon=”fa-envelope-o” icon_circle=”yes” icon_circle_color=”#1e73be” width=”” alignment=”center” class=”” id=””/][fusion_text]Next, I wanted to tie the entire piece together to be a nice little package that people opened up. I also liked this because we are “tying the knot” so it served more than one purpose. I first tied the twine around it horizontally but noticed that everything just slid out the bottom, so I wrapped it both horizontally and vertically and twisted it together on the back to make a bow on the front.
I am pleased with the final product. Once I had decided what I was going to do, I got an envelope and sample invite, and had it weighed at the post office. The nice man asked me “Do you need the twine…?” and I hesitated and said, “Yes, kind of. How much will it cost me?” I had accepted that postage was going to be part of this cost and I was not backing down on my twine!
 [/fusion_text][fusion_separator style_type=”double|dotted” top_margin=”” bottom_margin=”30″ sep_color=”#81d742″ border_size=”” icon=”fa-envelope-o” icon_circle=”yes” icon_circle_color=”#1e73be” width=”” alignment=”center” class=”” id=””/][/fusion_builder_column][fusion_builder_column type=”1_1″ background_position=”left top” background_color=”” border_size=”” border_color=”” border_style=”solid” spacing=”yes” background_image=”” background_repeat=”no-repeat” padding=”” margin_top=”0px” margin_bottom=”0px” class=”” id=”” animation_type=”” animation_speed=”0.3″ animation_direction=”left” hide_on_mobile=”no” center_content=”no” min_height=”none”][fusion_title size=”1″ content_align=”left” style_type=”none” sep_color=”” margin_top=”” margin_bottom=”” class=”” id=””]The Finished Product[/fusion_title][fusion_text]After preparing all the pieces, I had my dad help me print clear address and return labels on the printer. Brighton, Katie and I created an assembly line to stick, stamp, and stuff the invitations. I did this over the course of a couple weeks due to the plans I had and family obligations.

I did the return address labels, then the addresses, then the stamps on the envelopes. (Just in case I messed up the previous two labels).
Then for the invitations themselves, I layered the invite at the bottom, the layer of gold vellum, the RSVP cards, and then tied it all together with twine.

Once all the envelopes were stuffed, I used the sponge technique to seal them all, and the morning of my bridal shower, I mailed them all!
One thing I forgot to do is number the RSVPs, in case people forget to fill their name in or if their handwriting is not legible. Oh well, I guess I’ll just be figuring that out then.[/fusion_text][/fusion_builder_column][/fusion_builder_row][/fusion_builder_container]